Canada’s Instrumentation Leader Since 1946.


Penetration tests are performed on petroleum products to determine consistency and shear stability (lubricating greases) for design, quality control and identification purposes. A standard cone or needle is released from a penetrometer and allowed to drop freely into the sample for 5 seconds (or a different specified interval) at constant temperature. The depth of penetration of the cone or needle into the sample is measured in tenths of a millimeter by the penetrometer.
Penetration tests are performed on petroleum products to determine consistency and shear stability (lubricating greases) for design, quality control and identification purposes. A standard cone or needle is released from a penetrometer and allowed to drop freely into the sample for 5 seconds (or a different specified interval) at constant temperature. The depth of penetration of the cone or needle into the sample is measured in tenths of a millimeter by the penetrometer.
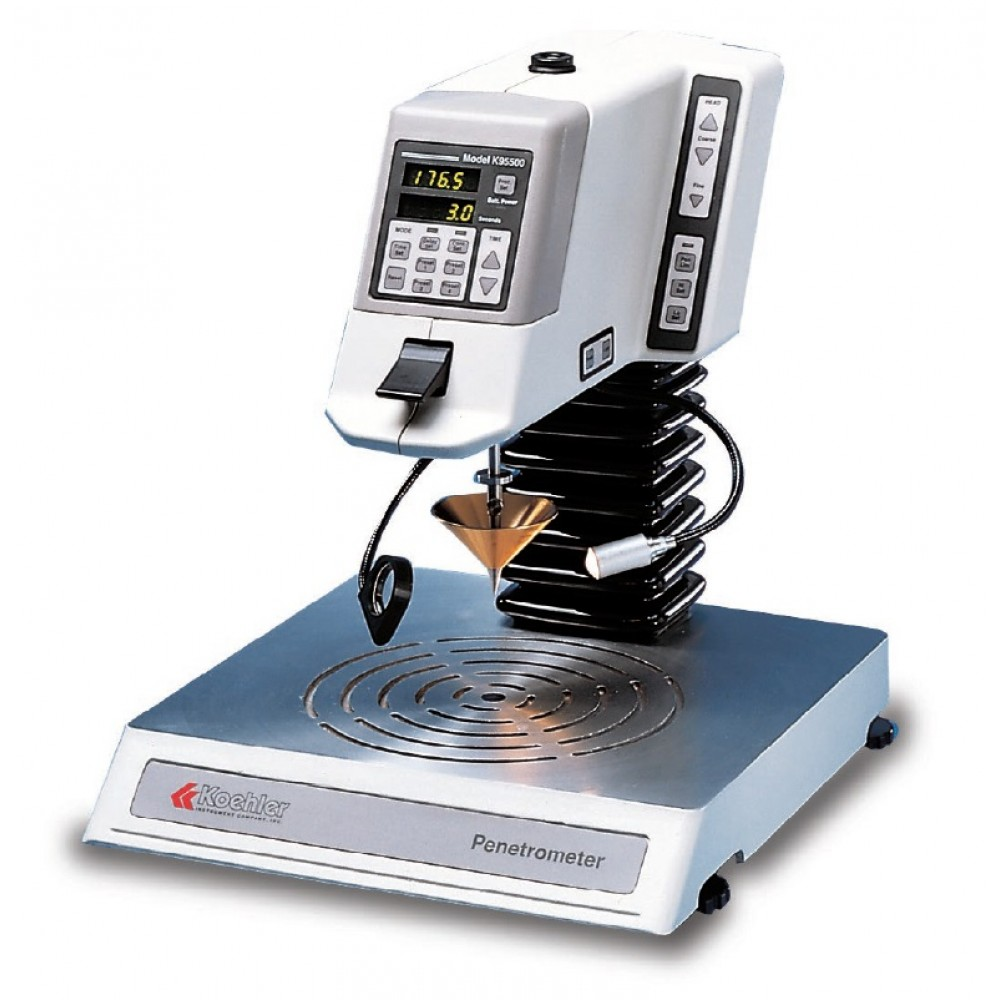
Microprocessor-based penetrometer loaded with advanced features to provide ease of operation and highly reproducible consistency measurements of petroleum products. Microprocessor control provides a full range of measurement and reporting options, and operation is simplified by four user-programmable presets that facilitate lowering the penetrator tip to the sample surface.
Automatically timed penetrations—The penetrometer defaults to the standard ASTM interval of 5.0 seconds, or the operator may conveniently program a different interval in the range between 0.1 and 9999.9 seconds (in 0.1 second increments). A curing or temperature stabilization period may also be programmed by the operator (to delay the release of the penetrator into the sample) and for added convenience all selected parameters are retained in memory and automatically repeated in subsequent tests until changed by the operator. Separate keypad controls for each parameter simplify operation. Penetration and delay intervals count down on a large, easy to read LCD on the head of the unit.
Convenient measurement and reporting options—Penetration measurements in the full range of 0 – 620 in 1⁄10mm scale are reported in either 1⁄10mm or 1⁄100mm increments at the operator’s option. For quality control testing, a penetration range can be entered into memory prior to testing. If a test result falls outside of the programmed range, an audible signal and visual error message alert the operator of a failed sample. Test results are displayed in digital format on a large LCD readout on the head of the penetrometer and can be communicated to a printer or computer via a built-in RS232 interface.
Simplified penetrator tip placement—Correct placement of the penetrator tip on the sample surface is essential for accurate penetration test results. The Koehler Digital Penetrometer has four operator programmable presets that lower the penetrator to the sample surface height at the touch of a button, greatly simplifying the process to ensure reproducibility. A fine adjustment button permits slight adjustments as needed. Full manual operation is also available with the use of coarse and fine push button controls and built-in magnifier and illuminator arms. When testing electrically conductive samples, a built-in circuit senses the sample surface for automatic placement. After testing, the penetrometer head returns to a raised position at the touch of a button to facilitate cleaning of the penetrator and changing of the sample.
More convenience features—The detachable machined base provides a large platform to accommodate a wide range of sample containers and constant temperature cylinders. It removes easily to permit the head assembly to be reversed (for use with a constant temperature bath) or mounted directly to a bath housing or other location. A built-in rechargeable battery pack permits field operation and provides back-up in the event of power interruption. Battery recharges automatically during operation of the penetrometer on standard AC electrical service.
Conforms to the specifications of: ASTM D5, D217, D937, D1321, D1403,
D2884, D4950, D5329; IP 49, 50, 179, 310; ISO 2137; DIN 51579, 51580, 51804; FTM 791-311, 791-312, 791-313; AOCS Cc 16-60; AACC 58-14; NFT 60-119, 60-123, 60-132, 66-004
Penetration Range: 0-62.0mm (0-620 penetration scale) in 1⁄10mm or 1⁄100mm
Penetration Interval: Operator variable from 0.1 to 9999.9 seconds with automatic repeat function and 5.0 second default
Copyright - 2026 - Hoskin Scientific