Canada’s Instrumentation Leader Since 1946.


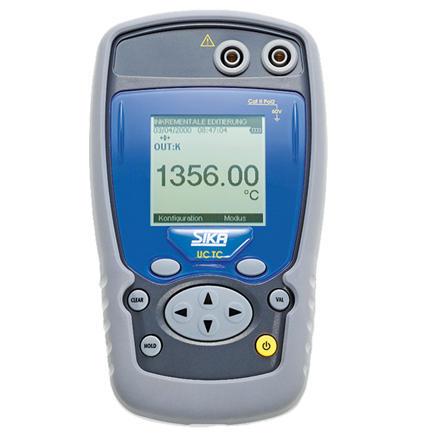
Measurement / generation Thermocouples (TC) J, K, T, R, S, B, N, E, U, L, C Accuracy (of rdg. + const.) ±0,02 % Data memory 10 000 values SIKA simulators have been developed for simple and flexible calibration and maintenance. Various tests can be performed in a single operation without having to change instruments. This […]
SIKA simulators have been developed for simple and flexible calibration
and maintenance. Various tests can be performed in a single operation
without having to change instruments. This saves time. Our
mono-functional simulators are especially useful if you only require one
signal type.
Main applications
Numerous other applications are also possible.
Multifunction display
The back-lit multifunction display ensures clear indication of input and output values as well as all adjustments.
Operating concepts
Features include a rubber keypad, convenient interactive menu control
via function keys, navigator and numeric keypad. These features allow
easy selection and display of numerous functions.
Steps and ramps
An automatic program is generated for periodic calls. The type of
signal, duration and value are defined. Start delay, number of
repetitions and a continuous linear increasing or decreasing
characteristic can be individually programmed.
High-speed call
Signal values needed time and again are permanently or flexibly stored
in the simulator and can be recalled quickly at the push of a button.
Synthesizer
The synthesiser function can be used for the generation of a
discontinuous characteristic with changing signal values. Previously
programmed changing signal levels are displayed on the simulator.
This function allows the simple definition and successive call of
different steps, ramps or synthesiser values for easier testing.
Calibration and linearisation points
If the measuring characteristics and deviations of a sensor are known
and these are available in the form of a calibration certificate, they
should be taken into account in measurement to obtain accurate measuring
results.
The simulator input can be shifted linearly by offset programming to
approach the measuring characteristics of the sensor. This single-point
calibration is the simplest and most popular method for improving
measuring results.
Multipoint calibration can be used for greater measuring accuracy. The
input is configured by means of four linearisation points to the real
sensor characteristics to compensate for linearity errors. Up to five
different calibration data files can be directly stored and easily
recalled as required.
Copyright - 2026 - Hoskin Scientific